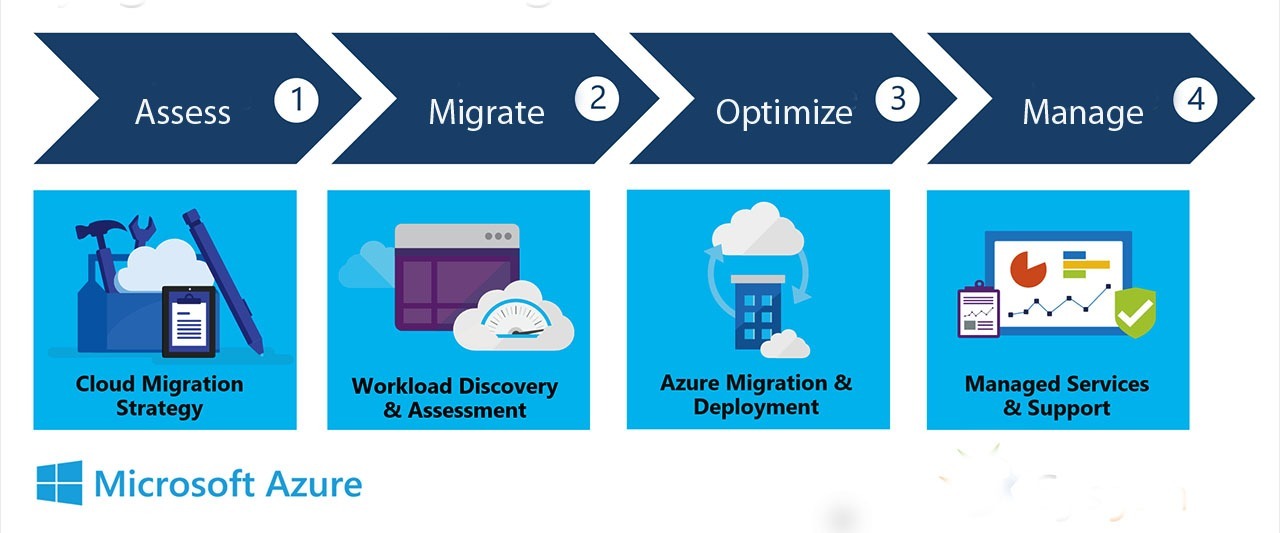
We will try to explore here, when is it the time to think of moving to Azure Windows Virtual Desktop (WVD) which comes as hosted desktop as a service (DaaS) and its advantages; in case you are using Remote Desktop or Virtual Desktop service. We will also understand how Azure Migrate service with all its features helps to make the migration process smooth.
Remote Desktop Services or RDS denotes the collective features of Microsoft Windows Server, with which the users can access Windows desktops and applications remotely.
Whereas, Virtual desktop infrastructure or VDI is a technology of desktop virtualization that helps Microsoft Windows desktop operating system (OS) to manage and run in a situation like on-premise environment or cloud data center. Here, the desktop image is delivered to an endpoint device (could be a traditional PC, mobile or thin client), along with the OS and apps as though they are running locally.
You can think Windows Virtual Desktop (WVD) as the successor of RDS or VDI.
Even some time back VDI was taken as a magic cloud revolution that helps in reducing costs, saves deployment time, standardizes application experience and takes away all the expense and management issues of user devices completely. Because everything would be available in the datacenter on secure servers.
Yet, companies still had to worry about the endpoints to ensure that proper security is maintained. The savings got used up in keeping infrastructure and expertise to give support.
Windows Virtual Desktop on Azure, on the other hand, comes with new features, capabilities that help you to migrate your existing virtual desktop workloads to Azure; irrespective of whether you are building a new environment ground up or trying to transform your RDS/single session Windows 10 virtual machines.
Advantages of Windows Virtual Desktop over RDS/VDI
- WVD comes as a Platform-as-a-Service (PaaS) meaning, it is Microsoft which runs the show completely without the need of end-user involvement.
- Windows 10 Enterprise multiple session capabilities come as the unique feature of WVD.
- Free Windows 7 Extended Security Updates for the next three years till 2023.
- FSLogix Profile Container integration helps in flawless user profile management, which was so challenging earlier, and also the optimized support for Office365 ProPlus.
Azure Migrate
The Azure Migrate helps you in planning your cloud migration like moving personal desktops, on-premise infrastructure, applications and data to Azure cloud. It will help you to assess how your on-premise workloads will perform along with the costs.
Features of Azure Migrate
Unified migration platform enabling you to commence, run and finally track you Azure migration.
Azure Migration Tool Hub along with Azure Migrate: Server Assessment and Azure Migrate: Server Migration. It also helps to integrate with other Azure services.
Azure Migrate: Server Assessment helps to assess any on-premise server (e.g. Hyper-V) and physical servers whether they are ready for Azure migration.
Azure Migrate: Server Migration onthe other hand helps in actual migration of on-premise, physical server, other virtual machines or public cloud virtual machines to Azure.
Azure Databases Migration Assistant (DMA) for assessing your on-premise SQL Server databases to Azure SQL DB, Azure SQL Managed Instance or Azure VMs running SQL Server.
Azure Databases Migration Service (DMS) helps in the migration of your on-premise databases.
Web application Assistant for assessment and migration of the on-premise web apps to Azure App Service with the help of Azure App Service Assistant.
Virtual desktops for moving your on-premise VDI to Azure Windows Virtual Desktop.
Azure Data Box provides fast and cost-effective solution to migrate all your data on Azure.
Movere, the Microsoft acquired SaaS platform helps you to gain visibility and control over the environments irrespective of geo-location, application or platform used.
Azure Migrate also integrates with a number of independent software vendor (ISV) offerings (for example, Lakeside, Rackware and others).
Migration Scenarios
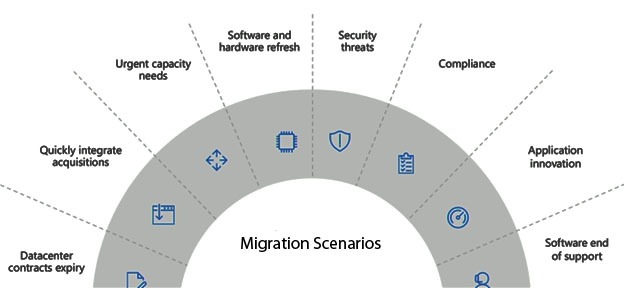
The following could be the migration scenarios which you can consider moving your workload from on-premise to Azure…
- If your lease of data center is expiring, then you may consider it to be a good time for migration.
- Software reaching the end of support then it is the time to use cloud.
- Hardware refreshing cases.
- Application innovation.
- Security, compliance requirements.
Migration Journey- understanding the phases
Assessment
In assessment stage get the audit of all things on your on-premise environment that are ready to go to the cloud. You may need to fix few things before you migrate. Because not all workloads are readyto migrate to the cloud. Therefore, you need to find out the issues if they can be tweaked and fixed.
Migration
Here is where the actual migration starts with the help of migration tools that you choose and the steps that you follow for migration.
Optimize
For the cost management in Azure.
Management
Involves user and application management.

Azure Migrate: Key Tools for the key migration Scenarios
Azure Migrate helps you in all the process of Assessment and Migration stages. You can use the ISV tools from Microsoft partners as well.
Azure migrate also gives you end-to-end progress tracking which you can use to track your migration journey across different workloads and steps of your migration. Azure Migrate also brings a center Data Depository for your migration.
There are different Azure tools for different migration scenarios like…
a) Server scenario– helps you to move Windows/Linux servers to Azure
b) Database scenario– you can move your SQl/non-SQL databases to Azure
c) Offline Database movement scenario
d) Virtual desktop migration scenario – the available tools help to migrate your virtual desktop environment to Azure Windows Virtual Desktop. (you can also use the Microsoft partner tools for the purpose).
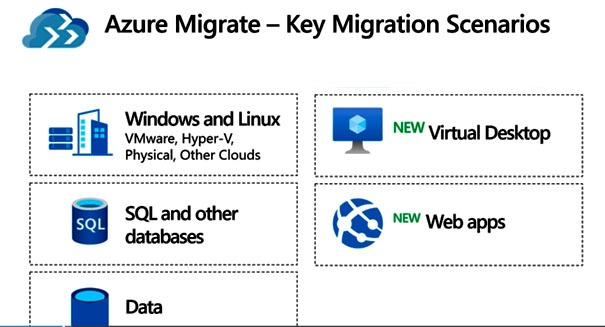
e) Web Application migration scenario– there are tools in Azure Migrate that help you to migrate your on-premise applications.
Let us consider the migration scenarios of Virtual Desktop.
Migration: The Considerations
When you want to migrate your virtual desktop to WVD, there are a few things to consider.
i) Suitability of migration analysis: there could be OS constraints to Azure and hence you need to understand whether the on-premise Operating Systems are compatible with Azure.
ii)Sizing of CPU, Memory: to understand the sizes of vCPU and Memory you would require for shifting your on-premise CPU, Memory size to Azure. Because often we over-allocate our on-premises resources and they remain unutilized. This assessment will help you to optimize your resources on the cloud.
iii)Licenses & Dependencies: to understand the license requirements and dependencies to ensure you are not leaving anything behind.
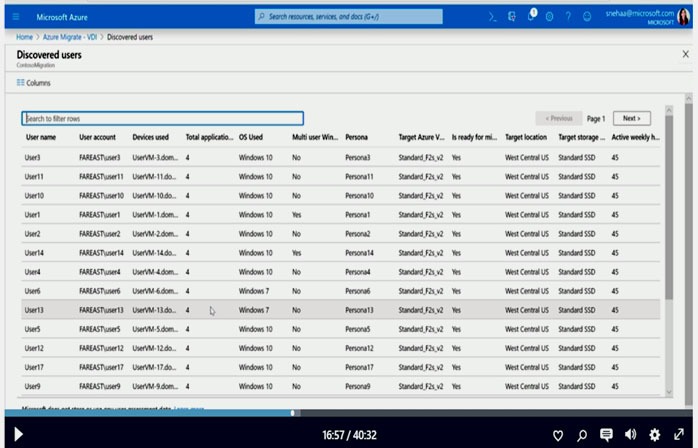
iv)Collection of Users: there would be users for pooled desktops and others needing stand-alone desktops. Accordingly, you can understand the VMs you would be needing in WVD.
v) Application Rationalization: there would be applications that are rarely used and those which are critical that must move to the cloud. The rarely used applications you can leave off from migrating to cloud.
vi)User Density & Segmentation: for the users using pooled desktops, the set of users that would be sharing a desktop and also those using the same kind of applications.
vii)Cost Estimation: to help you know the cost of moving your desktop resources to Azure and running them.
Migration Assessment
You can access Azure Migrate from Azure Portal. There you will get a dashboard showing all the different migration scenarios as discussed above. You choose the one applicable to you.
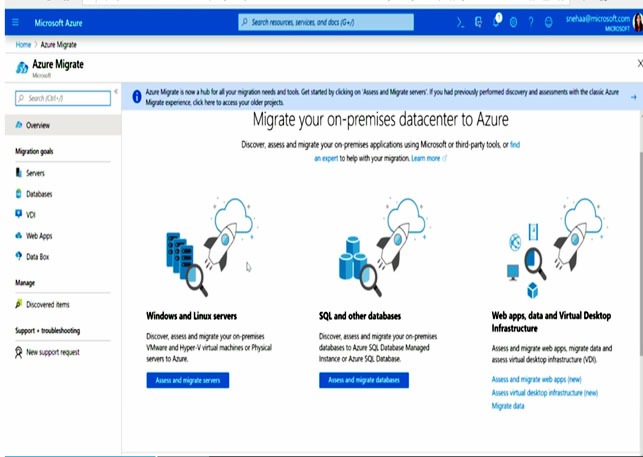
To get started with your assessment you need to start the Assess Virtual Desktop Infrastructure. There you will be able to create a Migration Project for you. It is associated with your subscription, resource group, geo-location to store your data (in case you do not wish your data to move out of your geographic location) and project name.
Next, you will be allowed to select an Assessment Tool (e.g. Server migration). And once you add a tool, it will create a project for you and the required tools will be added to your project and start assessing your project.
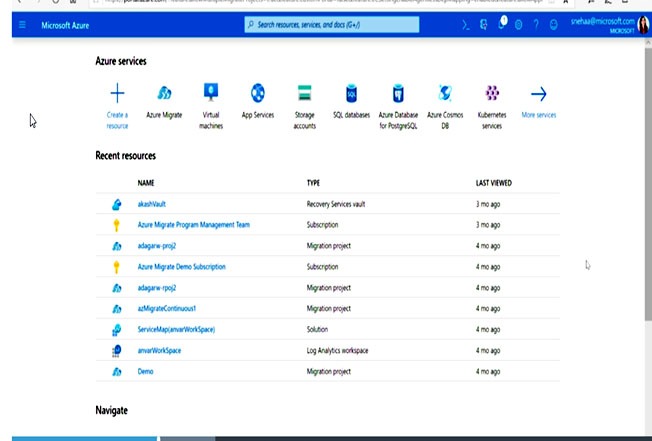
First, it will assess your entire on-premise environment as we have discussed in the virtual desktop migration scenario above. The data will then be pushed to Azure Migrate.
There you will get an exhaustive report on the entire assessment journey including the tools you have used for the purpose.
The Migration process to Windows Virtual Desktop
a) The Paths
There are 2 paths that can be taken.
1. Migration Path1 focused at operational efficiency which helps you to lift and shift your desktop environment to Azure and modernize them later. The trigger here is infrastructure oriented e.g. data center lease, expiry etc.
2. Migration Path2 focused on innovation and efficiency. (The triggers are mostly app oriented like legacy apps and if you wish to modernize them). If you are in greenfield category (building everything ground up) you can use this path.
b) The Journey
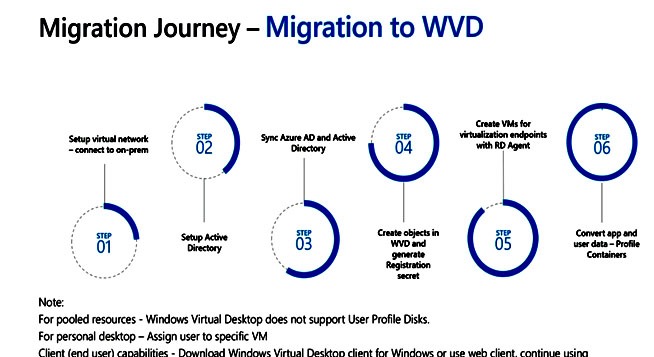
It happens in the following steps…
1. Setup your virtual network-connect to on-prem
2. Setup Active Directory
3. Syn Azure AD and Active Directory
(Steps 2 & 3 can be done interchangeably)
You will need a local domain controller set up in your virtual network and need to synchronize your user details to Azure Active Directory. You can first do the syn and later set up your domain controller or vice versa.
4. Create objects in WVD and generate registration token. First, get into your windows virtual desktop environment and create objects like a) WVD tenant that connects your WVD to your Azure Active Directory Tenant and b) setting up of host pool or the VM sets that you have decided to add to your WVD. Next, you will get a registration token.
5. Once you have your WVD you can move your virtual machines (either migrate or create new VMs) and connect them to WVD.
6. Migrate the user data to Azure. Keep in mind that WVD does not support User Profile Disks (UPDs-if you are using them) but supports FSLogix Profile Containers. So, you have to convert your UPDs to Profile Containers. If you are using Personal Desktops you need to assign the users directly to the virtual machines.
Your journey doesn’t end after moving things to Azure. You continue to optimize your virtual desktop workloads in Azure, for cost, latency issues and continue managing them.
You can consider Apps4Rent for any help as we are a Microsoft Gold partner offering managed Azure solutions. For over 15 years we have remained as the most reliable, cost-effective hosted software service provider helping 10,000+ clients across 90 countries. Please feel comfortable in reaching us any time via chat or call 1-646-506-9354.

